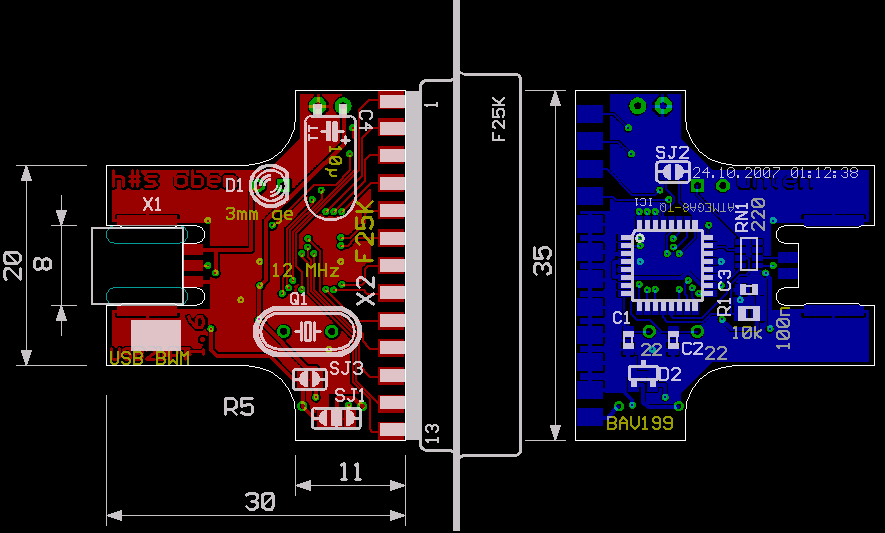
If 3.3V operation of ATmega is wanted, a user can now populate a dual diode BAV199
instead of the LD1117 of the previous version.
This enables drawing less than 500 µA of standby current in this case.
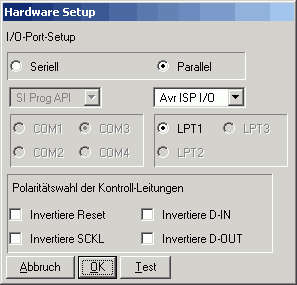
PonyProg: Setup interface
as shown here,
check by connecting the プログラミングアダプタ
(this checks for connection between Pin 2 and Pin 12),
invoke Setup→Calibration
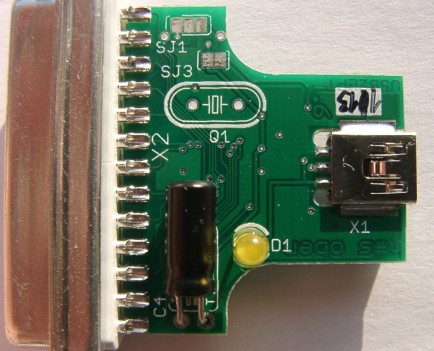
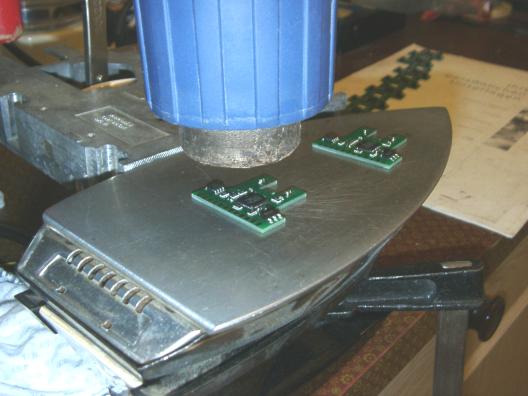
put SMD cream, 4 SMD components, make a
reflow process – or solder by hand
ショート回路の5 Vとグランドの間をチェック
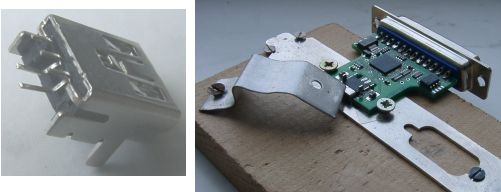
press and solder SubD receptacle keeping ½ mm gap between PCB and SubD shroud
Align and solder USB receptacle (see helper tool),
solder the pins with lowest possible iron temperature
電解コンデンサを装備 as flat as possible
Align and solder the LED using the shell, watch for right polarity
ショート回路の5 Vとグランドの間をチェック again
Check “operation” by connecting the USB cable, must show as
“inoperational USB device”, this is the power supply for programming
the bootloader
プログラミングアダプタをold-style
parallel portに連結する、 and program the bootloader
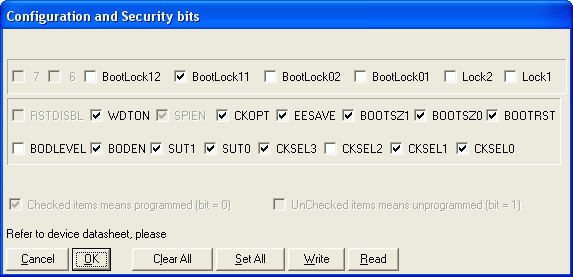
PonyProg: load main.hex, write,
set fuses as shown here
WinAVR: invoke make fuse flash lock
(directory src/firmware/USB2LPT6/bootloadHID)
USB2LPTを引くと連結する、
let install driver usb2lpt.inf
プログラミングアダプタを削除する
Scratch jumper SJ2 (the only solder jumper on silk-screen-less lower PCB side)
LPT checkerを連結する、
Kurzschlusstest.exeを呼び出す、 make corrections if necessary
Close shell, make a final check
PCBの既知のバグ
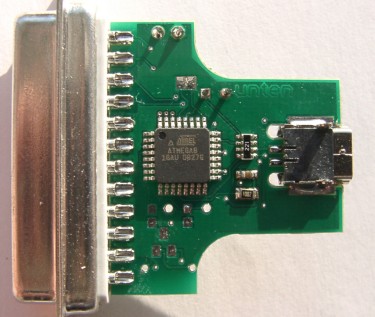
The crystal and the both 22 pF capacitors are not to populate
Population with ATmegaX8 is currently not recommended.
If you want ATmega48 population, R1 should be 4.7 kΩ,
and the older firmware USB2LPT5 must be used.
A bootloader cannot be used (this chip has no bootloader support)
If D2 (BAV199) is used, R1 must be 1.5 kΩ
はんだジャンパー
This revision 6 (USB2LPT 1.6) has 3 pre-connected solder jumpers:
SJ1 can assign power to pin 25 of SubD receptacle:
open: Pin 25 unbeschaltet
right connected: Pin 25 to ground (default)
left connected: Pin 25 to 5 volts
If power is needed, populating a self-resetting fuse is highly recommended.
SJ2, connected at PCB fabrication,
scratched at device manufacturing: activates the RESET pin of ATmega
for programming the microcontroller.
SJ3, connected by default, scratch when you want
3.3 volts operation of ATmega8 (e.g. for safer JTAG connection),
populate a BAV199 and change R1.
Moreover, scatch it to measure device's current consumption and re-solder.